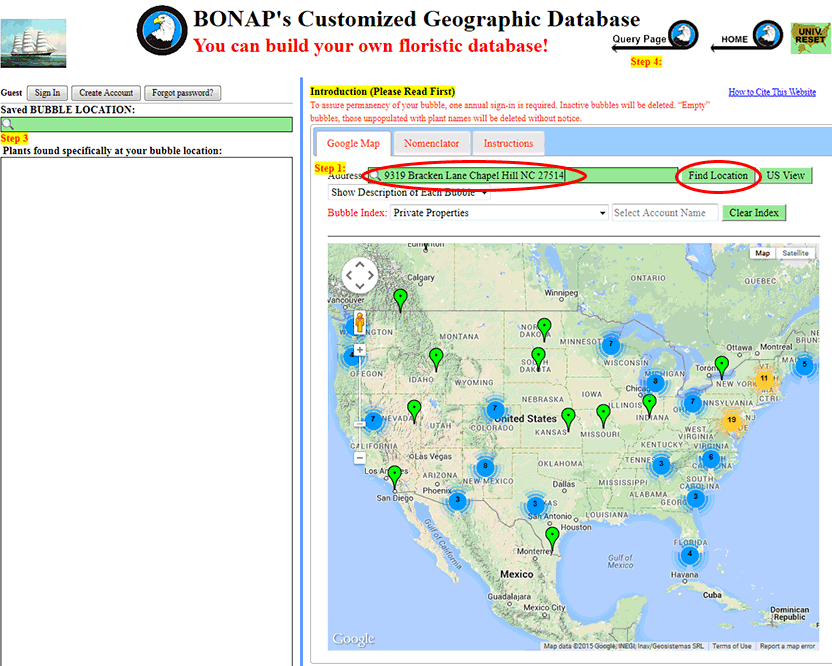
Step 1: Enter your address or location into the 'Address' bar. Then click "Find Location". Note: Using a street address or a zip code will result in a more refined "pick-list" than using a city or state alone.

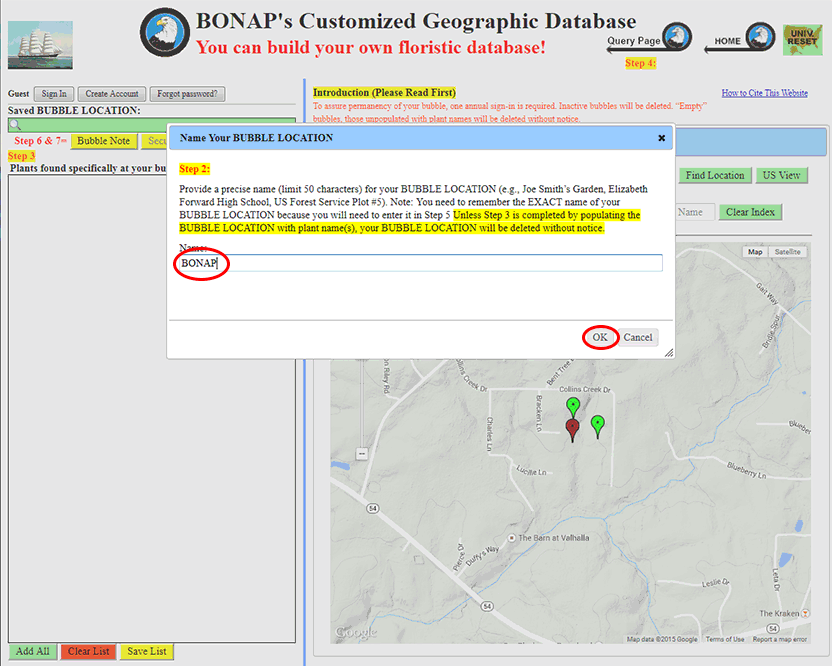
Step 2: Provide a precise name (limit 50 characters) for your BUBBLE LOCATION (e.g., Joe Smith’s Garden, Elizabeth Forward High School, US Forest Service Plot #5). Once you have entered the name, left-click "OK."

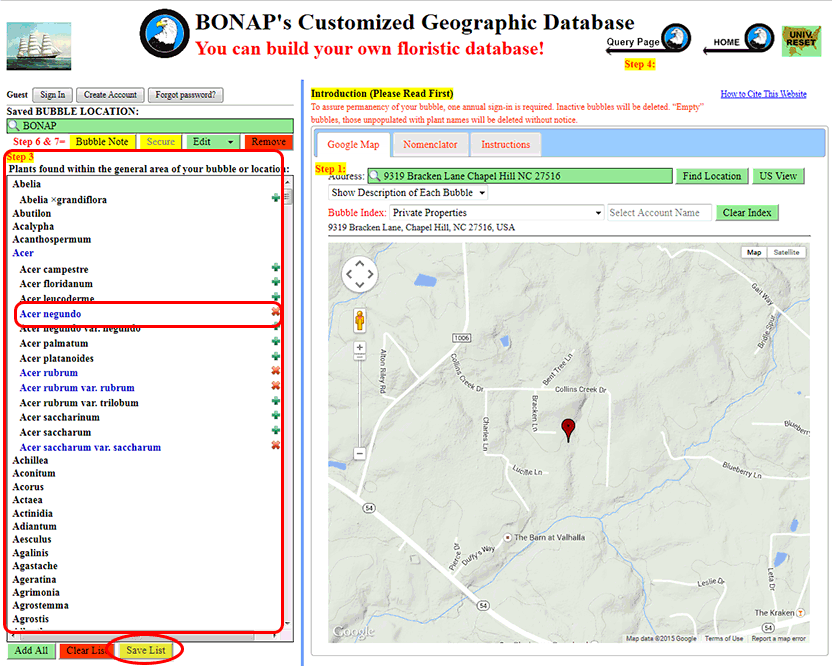
Step 3: You can refine further the list of plants found at your BUBBLE LOCATION to include only those within your garden, forest woodlot, school grounds, etc. Simply use the left mouse button to click on the genus name to see the list of species and infraspecific names and then clicking on the desired speice/infraspecific name You may also click on the + (plus sign) following the name of the plant found there. Notice that the font color changes when the plant name has been selected. To add the names of plants that do not naturally occur in your general area, see Using the Database Page Nomenclator. Once your list is complete, click ‘Save List’ found at the bottom of the list.
